
Lighting can completely change the vibe of your home. If you’re looking to brighten up your living space or add a touch of elegance with a new chandelier, DIY lighting installation is an affordable way to make your place shine. In this step-by-step guide, we’ll walk you through the process of installing lighting fixtures, share some handy safety tips, and help you pick the right lighting options for your space.
Types of DIY Lighting Installations: Brighten Your Space with Personal Touches
Installing your own lighting fixtures can be a fun, rewarding project that adds both function and flair to your home. Whether you’re looking to illuminate a dark corner or create a statement light fixture, DIY lighting installations allow you to customize the ambiance to fit your style and needs. Below are some popular types of DIY lighting installations that can easily transform your space.
1. Ceiling-mounted Light Fixtures
Installing a ceiling-mounted light fixture is an excellent way to make a bold statement in any room. Whether you choose a chandelier, pendant light, or a ceiling fan with integrated lights, this installation can dramatically change the space’s feel. DIY enthusiasts can customize the look with materials like copper pipes, wood, or upcycled materials. A ceiling-mounted fixture works particularly well in dining rooms, kitchens, or large living areas where you need both functional lighting and style.
2. Track Lighting
Track lighting offers a versatile way to direct light exactly where you need it. It’s ideal for areas that require adjustable lighting, like kitchens, galleries, or workspaces. You can create your own track lighting installation using metal rails, adjustable light heads, and bulbs that suit your style. Track lighting allows for creative designs, whether you choose a modern, industrial look or a more traditional style. It’s perfect for illuminating specific features in your home, such as artwork, a workspace, or shelves.
3. Wall-Mounted Lighting
Wall-mounted lighting, such as sconces or wall lamps, is perfect for smaller spaces or to add accent lighting to a room. DIY wall lighting is an excellent choice if you want to save space and create ambient lighting without taking up floor or table space. You can easily install wall sconces in hallways, bathrooms, or bedrooms to create a soft glow that adds warmth to any environment. With a bit of creativity, you can make wall-mounted fixtures from materials like pipes, reclaimed wood, or metal baskets.
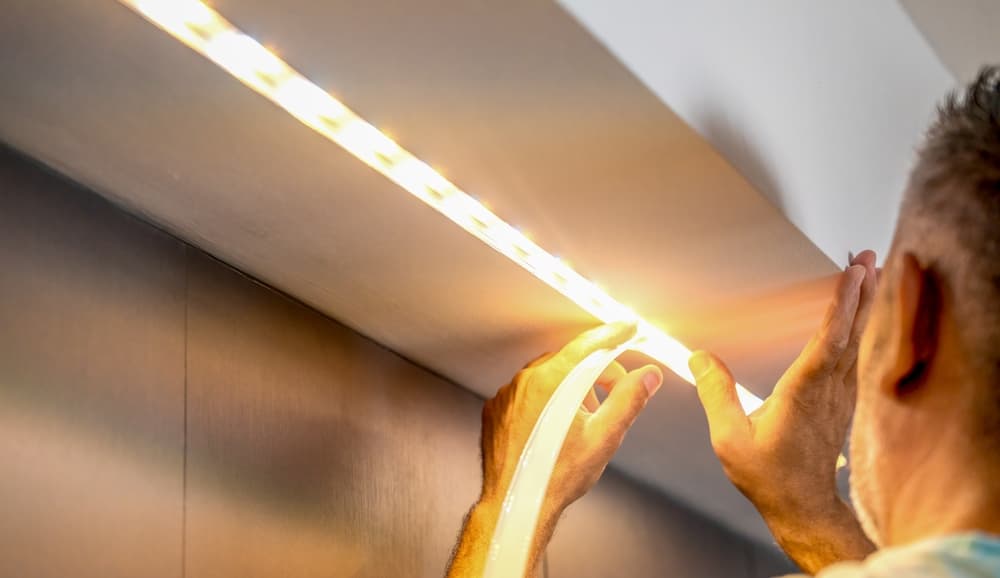
4. Under-cabinet Lighting
Under-cabinet lighting installations are perfect for kitchens, bathrooms, or even home offices. They provide task lighting for countertops and workspaces, making it easier to complete tasks like cooking or reading. You can install under-cabinet lights with LED strips or puck lights, which are energy-efficient and easy to install. DIY enthusiasts can mount these lights under kitchen cabinets, bookshelves, or bathroom vanities to brighten up otherwise dim areas. These installations offer both functional lighting and an added design element.
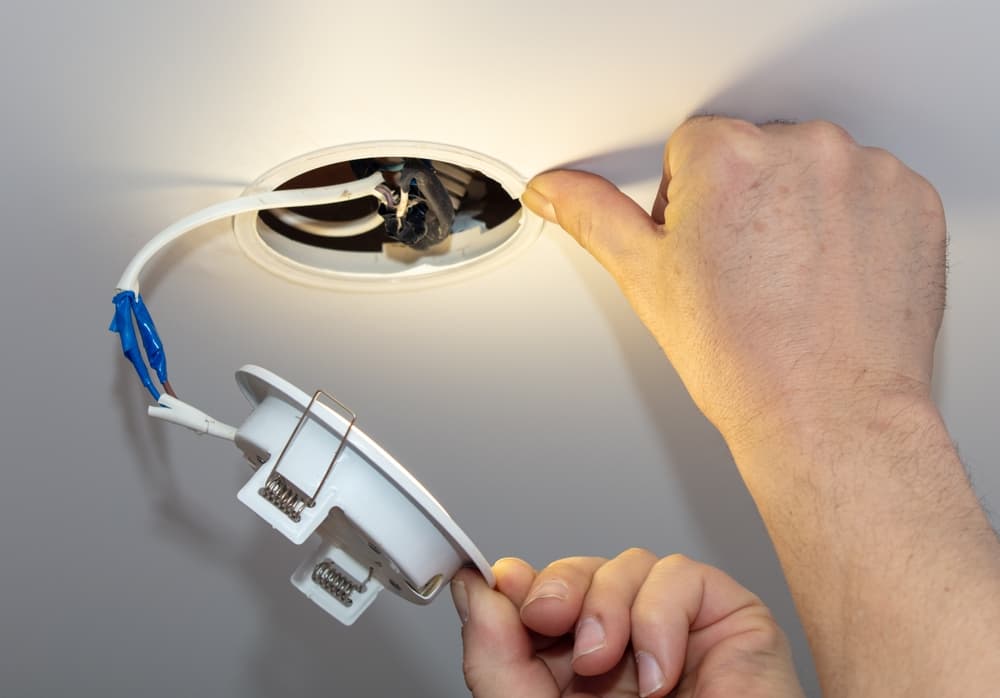
5. Recessed Lighting (Can Lights)
Recessed lighting, also known as can lights, provides a sleek, modern look and can be installed flush with the ceiling for a clean, minimalist design. This type of installation is particularly useful for kitchens, living rooms, or bathrooms where you want a bright, unobtrusive light source. DIY recessed lighting installations require a bit more expertise, as you’ll need to cut holes in the ceiling and wire the lights properly. However, with a bit of preparation and the right tools, recessed lighting can elevate your home’s overall design and lighting.
6. Outdoor Lighting
Installing outdoor lighting can make a huge difference in your home’s curb appeal and functionality. DIY outdoor lighting includes a range of options, from solar-powered garden lights to hardwired lights mounted on fences or walls. String lights are also a popular choice for patios and porches, adding a festive touch for gatherings. If you’re looking for a more permanent solution, consider installing post lights along pathways or along the perimeter of your yard for security and ambiance. Outdoor lighting installations are an easy way to extend your living space outdoors and create a welcoming atmosphere.
7. Pendant Light Installations
For a more stylish, bold lighting option, pendant lights can be a perfect addition to your DIY lighting projects. Whether it’s a single pendant over a kitchen island or multiple pendants clustered together above a dining table, pendant lights are a striking way to add a modern touch. DIY pendant light installations involve hanging a light fixture from the ceiling using a cable or chain. You can create a unique look by customizing the shade with materials like fabric, wire, or glass, making the fixture as distinctive as your space.
Why DIY Lighting Installations Are Worth the Effort
Installing your own lighting is not only a great way to save money, but it also gives you the opportunity to infuse your personal style into your space. Many lighting installations can be done with simple tools and basic electrical knowledge, and the results are both functional and stylish. Plus, DIY installations are a fun way to get hands-on and personalize your home in a way that store-bought fixtures can’t. Whether you’re installing ambient lighting, task lighting, or accent pieces, DIY lighting installations offer endless possibilities for creative expression and home improvement.
Pre-Installation Checklist & Safety Preparation
Before diving in, make sure you’ve got all the right tools and materials. Here’s your checklist:
- Tools: Screwdrivers (both flathead and Phillips), wire strippers, wire nuts, insulated pliers, voltage tester, ladder, and electrical tape.
- Materials: Your new light fixture, mounting bracket, screws, light bulbs (LEDs are always a great choice for energy savings), and a sturdy ladder.
- Safety Gear: Gloves, insulated tools, and a voltage tester to check that the wires aren’t live.
Safety First!
Always ensure that the power is turned off at the circuit breaker before you start. Double-check with your voltage tester to make sure the wires are dead. Safety is key — you don’t want to mess around with live wires!
Step-by-Step Lighting Installation Process
Step 1: Remove the Existing Fixture (if replacing)
If you’re swapping out an old fixture, start by removing the bulbs, shades, or covers. Use a screwdriver to unscrew the fixture from the mounting bracket, and make a note of how the wires are connected. This’ll help when you’re hooking up the new fixture.
Step 2: Prepare the New Fixture and Mounting Bracket
Once the old fixture is out, set up the new one. Follow the manufacturer’s instructions carefully. Most light fixtures come with a mounting bracket that you’ll need to attach to the ceiling junction box. Use a screwdriver to secure it tightly.
Step 3: Wiring the Fixture
Now it’s time to wire up your new fixture. You’ll typically have three wires: black (hot), white (neutral), and green or bare (ground). Use wire nuts to connect the matching wires from the fixture to the corresponding wires in the ceiling. If you’re not sure which wire goes where, take a look at the instructions or consult a pro.
Step 4: Secure the Fixture and Test It
Once the wires are all connected, carefully tuck them into the junction box and attach the fixture to the bracket. Tighten the screws to make sure it’s secure. Now, turn the power back on at the breaker and flick the switch to test the light. If everything’s wired correctly, it should light up straight away!
Lighting Design Considerations
When it comes to lighting, it’s not just about flipping a switch. The way you light a room can totally change the space’s feel. Whether you’re after bright task lighting in the kitchen or soft, relaxing vibes in the living room, lighting design is key to creating the perfect atmosphere.
1. Layered Lighting
To get the best out of your space, you need to think about three types of lighting:
- Ambient Lighting: This is your general lighting — the kind that fills the room and makes it livable. Think ceiling lights or downlights that give you that basic glow.
- Task Lighting: These are the lights you use for specific tasks like reading, cooking, or working. Desk lamps, kitchen under-cabinet lights, or vanity lights in bathrooms are all good examples.
- Accent Lighting: This is for highlighting certain things in the room, like artwork or architectural features. You might use track lights or wall sconces to make something pop.
By layering these three types of lighting, you can create a well-lit room that’s functional, cosy, and stylish. For example, your kitchen might need more task lighting for cooking, while your lounge could benefit from softer ambient lighting to chill out in.
2. Room-Specific Lighting
Each room needs different lighting, and knowing what you need makes all the difference:
- Kitchens: Bright, focused lighting is essential for cooking and food prep. Under-cabinet lights work wonders for task lighting while recessed lights brighten the whole room.
- Living Rooms: Here, soft, ambient lighting creates a comfy vibe. You can also add a bit of flair with accent lights to highlight some features like artwork or furniture.
- Bathrooms: Good task lighting is key, especially around mirrors. You want bright lights for grooming without the harsh shadows.
- Bedrooms: Soft lighting is a must for relaxation. A dimmable light will let you adjust the mood, and bedside lamps are perfect for reading.
3. Fixture Placement
It’s not just about picking the right light, and it’s also about where you put it. You don’t want your lights creating harsh shadows or spots that are way too bright. For example, place task lighting over areas like the kitchen island or your study desk, and use ambient lighting to fill the whole room. Add accent lighting to highlight that feature wall or piece of art.
Smart Lighting & Motion Sensors
As technology continues to evolve, smart lighting is becoming a go-to for Aussie homes. Imagine being able to control your lights with a tap on your phone or through voice commands. Plus, motion sensors make things even more convenient by turning on lights automatically when you walk into a room. How good is that?
1. Smart Lighting Systems
With smart lights, you’ve got full control over your space, all from your phone or smart speaker. These nifty systems let you:
- Control your lights remotely: Adjust the brightness or turn them off and on without having to move.
- Set schedules: Make sure your lights come on at the same time every day or when you’re home, no more coming home to a dark house.
- Create custom scenes: Want a dim, warm light for movie night? Or bright lights for cleaning day? Set the perfect lighting for every occasion.
2. Motion-Sensor Lighting
Motion sensor lights are a game-changer. They turn on when you enter a room or walk down a hallway, making them great for areas like:
- Hallways: Lights automatically flick on when you walk past, saving you from fumbling for the switch.
- Bathrooms: No need to worry about turning the light on in the middle of the night — motion sensors will do it for you.
- Outdoors: Motion sensors around your garden or at your entrance light up your path and boost security as you approach.
Advanced Troubleshooting Tips
Sometimes, lighting problems pop up even after you’ve installed everything correctly. Here’s how to troubleshoot a few common issues:
1. Flickering Lights
If your lights are flickering, check for these possible causes:
- Loose Bulb: Make sure the bulb is properly screwed in.
- Faulty Wiring: Loose wire connections could be causing the flickering. Double-check the wiring to make sure it’s secure.
- Dimmer Switch: If you’re using a dimmer, it might not be compatible with certain bulbs (like LEDs), which can cause flickering.
2. Circuit Breaker Tripping
If your circuit breaker trips when you switch on your new lights:
- Check Wattage: Ensure that the wattage of the bulbs doesn’t exceed the circuit’s capacity. If it does, you might need a lower-wattage bulb or to spread the load across different circuits.
- Short Circuits: If the breaker trips immediately after turning on the lights, you may have a short circuit. Double-check all wire connections to ensure they are secure and that there are no exposed wires.
3. Fixture Not Turning On
If your new fixture doesn’t light up, here’s what to do:
- Power Supply: Double-check that the power is actually on and the breaker hasn’t been tripped.
- Loose Connections: Ensure that all wiring is properly connected and that no wires are loose.
- Faulty Fixture: It’s also possible that the fixture itself is faulty. Try replacing the bulb or testing the fixture in another location.
Working with Old Wiring
Older homes often come with outdated wiring systems that can make lighting installation a bit more challenging. If your home is older, be extra cautious when working with electrical systems.
1. Identifying Old Wiring
- Knob-and-Tube Wiring: Homes built before the 1950s may have knob-and-tube wiring, which doesn’t have a ground wire and can be dangerous. If you find this, it’s essential to replace it before proceeding with any electrical work.
- Aluminum Wiring: Used in homes built between the 1960s and 1970s, aluminum wiring is more prone to overheating and can be hazardous. If you find aluminum wiring, it’s a good idea to consult an electrician.
2. Updating Outdated Wiring
If you come across old wiring, it’s best to call a professional to upgrade the system. An electrician will bring your home up to code and ensure everything is safe and functional.
Choosing the Right Bulb
Picking the right bulb is essential for getting the light quality you want while keeping things energy-efficient.
1. Bulb Type
- LED Bulbs: These are the best for energy efficiency. They last a lot longer than incandescent bulbs and use far less power.
- Incandescent Bulbs: These produce a warm light but are energy-guzzlers and burn out quickly.
- CFL Bulbs: Compact fluorescent bulbs are more efficient than incandescent bulbs but are less popular now due to the rise of LED technology.
2. Wattage and Brightness
When choosing bulbs, think about wattage (how much energy the bulb uses) and lumens (how bright the light is). With LED lights, you can get much more brightness with less energy, helping keep your power bills low.
Common Mistakes to Avoid
DIY lighting installation is pretty straightforward, but sometimes things can go wrong. Here’s what to watch out for:
- Incorrect Wiring: Make sure the hot, neutral, and ground wires are connected correctly. Messing this up could cause the fixture to malfunction or create a fire hazard.
- Loose Connections: Always make sure your wire nuts are tightly secured to avoid flickering lights or overheating.
- Overloading the Circuit: Don’t overload the circuit. Make sure your light fixture is compatible with your home’s electrical system. Overloading can cause your circuit to trip or even damage the electrical system.
When to Call a Professional
While DIY lighting installation can be a fun and satisfying project, there are times when it’s best to bring in a professional. Here’s when you should consider calling an expert:
- If you’re dealing with high-voltage wiring or complex electrical systems.
- If you have an older wiring system that you’re unsure about.
- If you’re installing something like recessed lighting or smart lighting, which may require extra steps and tools.
Why Choose Professional Lighting Installation Services in Sydney
While DIY is great, sometimes you just need a professional’s expertise. If you’re in Sydney and need help with lighting installation, Power Rangers offers a range of services to take care of everything from general lighting to LED and chandelier installations. Our team of licensed electricians will ensure that your new lights are installed safely and in compliance with local codes.
Our Lighting Installations
Before you get started, it’s good to know what type of lighting you’ll be working with. Here’s a rundown of some common lighting installations that you can easily take on:
- General Lighting – This covers standard ceiling lights, chandeliers, and pendant lights. These are great for general illumination in spaces like living rooms, kitchens, and hallways.
- LED Lighting – LED lights are energy-efficient, long-lasting, and come in all sorts of shapes and sizes. Whether you’re adding under-cabinet lighting or accent lights, LEDs are a solid choice.
- Light Installation – Installing ceiling fans, recessed lighting, or track lights to add both style and functionality to a room.
- Chandelier Installation – A chandelier can really elevate the look of a dining room, entryway, or bedroom. It might take a bit more effort, but it’s well worth the result!
Conclusion: You’ve Got This, But Safety Is Key!
Installing lighting fixtures yourself is a fun and rewarding project. With the right tools, a bit of patience, and these simple steps, you can easily tackle most lighting installations on your own. But remember, if you’re ever unsure, it’s always best to call a professional to ensure your home stays safe.
If you’re in Sydney and want a pro to handle your lighting installation, Power Rangers are here to help with everything from general lighting, LED installations, to chandelier fitting. Get in touch with us for fast, reliable, and safe lighting services.
FAQ:
Q: Can I install a chandelier by myself?
A: Absolutely! Chandeliers can be installed by DIYers, but they require a bit more effort than standard light fixtures. Make sure your ceiling box can support the chandelier’s weight, and if you’re not comfortable, call in an expert.
Q: How do I know if my electrical box can hold a new fixture?
A: Check the box’s rating. If you’re unsure, you can always ask a licensed electrician to assess it for you.
Q: Is it safe to install lighting if I don’t turn off the power?
A: No way! Always turn off the power at the circuit breaker. It’s a simple step that could save you from serious harm.